How to Set Up a Tarp Shelter: 8 Proven Configurations for Camping and Bushcraft
A good tarp shelter setup comes down to three decisions: where you pitch, which configuration matches the weather, and how you tension the lines. Get those right and a single sheet of coated fabric will keep you dry through rain, block wind and shade you from the sun, often at a fraction of the weight of a tent. This guide walks through eight proven configurations, from the classic A-frame to a fully enclosed tarp tent, plus the sizing, materials, cordage and knots you need to pitch each one with confidence.
Why Choose a Tarp Over a Tent?
Tarps have been standard issue for soldiers, foresters and bushcrafters for generations because they are simple, adaptable and easy to repair. A tent gives you one shape; a tarp gives you a dozen. You can pitch it high for airflow on a muggy night, drop it low against driving rain, or rig it as a cooking shelter beside the fire.
- Versatility: one tarp covers sleeping, cooking, gear storage and emergency use.
- Weight and bulk: without poles, inner mesh and a sewn floor, a tarp packs smaller than most tents of the same footprint.
- Ventilation: open sides mean far less condensation than a closed tent.
A tent still wins in a few situations: heavy insect pressure, very exposed ground above the treeline, or sustained storms with shifting winds. Many people carry both, using a tarp as a living area in front of a small tent.
Choosing the Right Tarp
Size and shape
The shape of your tarp decides which pitches are possible.
| Shape | Strengths | Best configurations |
|---|---|---|
| Square (for example 3 x 3 m) | The most versatile; works on the diagonal and supports folded pitches | Diamond, plow point, C-fly, tarp tent, A-frame |
| Rectangular | Long coverage for a sleeper and gear; quick A-frames | A-frame, lean-to, wedge |
| Asymmetrical or hexagonal | Cut for hammocks; less fabric for the coverage | Hammock diamond, A-frame over a hammock |
As a rule of thumb, choose a tarp that is noticeably longer than you are when lying down, so rain blown in at the ends does not reach your sleeping bag. If you are unsure, a square tarp is the safest first purchase because almost every configuration in this guide can be pitched with it.
Materials and waterproof ratings
Most modern tarps use polyester or nylon with a polyurethane (PU) or silicone coating. Polyester stretches less when wet, so it holds tension better overnight. Nylon is strong and light but sags slightly in rain, which means you may need to re-tension the lines. Heavier Oxford-weave and canvas-style fabrics resist sparks and abrasion, which suits shelters pitched close to a fire.
Waterproofing is usually expressed as a hydrostatic head rating in millimeters: the higher the number, the more water pressure the fabric resists before it leaks. Check the rating on the product page and look for taped or sealed seams, since stitch holes are a common leak point. Tie-out points matter just as much as fabric: reinforced loops along the edges and at the center give you more ways to pitch than corner grommets alone.
Our bushcraft tarps cover lightweight and heavier fabrics, while the tactical tarps focus on muted military colors for a low-profile camp.
Cordage and the Knots You Actually Need
A tarp is only as good as its lines. Paracord is the standard choice for ridgelines and guylines: it is strong, rot resistant and the inner strands can be pulled out for small repairs. Pre-cut your cordage at home: one long ridgeline plus one guyline for each corner and side tie-out.
You can pitch every configuration below with five knots:
- Bowline: a fixed loop that will not slip, ideal for tying the ridgeline to the first tree.
- Trucker’s hitch: creates a pulley effect to tension the ridgeline tight between two anchors.
- Taut-line hitch: an adjustable knot for guylines; slide it to add or release tension without retying.
- Prusik knot: a friction hitch on the ridgeline that lets you slide the tarp corners into position.
- Slipped half hitches or clove hitch: fast attachment to stakes, branches or poles, and easy to undo with cold hands.
Practice these at home: a rainstorm in the dark is a poor time to learn.
Picking Your Site
Site selection prevents more problems than any knot.
- Look up first: avoid camping under dead branches or leaning trees.
- Read the ground: choose slightly raised, well-drained ground and avoid dips where water pools after rain.
- Check the wind: note the prevailing wind direction and plan to point the closed or low side of the shelter into it.
- Find anchors: two trees a little further apart than your tarp is long make ridgeline pitches quick. In open terrain, bring trekking poles or cut straight sticks where it is permitted.
- Respect the area: stay a reasonable distance from water sources and trails, and follow local rules on fires and cutting wood.
8 Proven Tarp Shelter Configurations
1. A-frame
The A-frame is the classic all-rounder. Tension a ridgeline between two trees at roughly waist to chest height, drape the tarp over it so it hangs evenly, then stake both long edges out at an angle. The steeper the sides, the better it sheds rain; the higher the ridgeline, the more airflow and headroom you get. It protects well on both sides but leaves the ends open, so orient one end away from the wind.
2. Lean-to
Tie one long edge of the tarp to the ridgeline and stake the opposite edge to the ground on the windward side, creating a single sloping wall. The lean-to is the best pitch for fair weather and campfire nights: the open front faces the fire and the fabric reflects heat back toward you. In rain, lower the ridgeline and steepen the angle so water runs off instead of pooling.
3. Diamond
Turn a square tarp on the diagonal. Tie one corner high to a tree or pole, stake the opposite corner low to the ground, then stake the two side corners out. The result is a compact, wind-shedding shelter that works well for one person and for covering a hammock when strung along a ridgeline from corner to corner.
4. Plow point
The plow point is a close cousin of the diamond. Raise one corner on a pole or tree, then stake the other three corners to the ground. You get a triangular entrance with a sloped back and closed sides, which makes it a strong choice for a solo sleeper in wind and rain. Point the low back into the weather and keep the entrance on the sheltered side.
5. Wedge
The wedge is built for steady wind. Run the ridgeline from a high anchor down toward the ground, drape the tarp over it, and stake the low end directly into the wind with the sides pulled down tight. The shape tapers from a tall, open front to a closed, low rear, so wind flows over the fabric instead of pushing into it.
6. C-fly
The C-fly combines a wall, a roof and a floor. Hang the tarp over the ridgeline with one side shorter than the other. Pull the longer side down at a steep angle, then fold the excess back under the ridgeline as a groundsheet, so the profile looks like the letter C. You get a sheltered back wall and a dry floor, which helps when the ground is wet. Use a square tarp for the extra fabric this pitch needs.
7. Tarp tent
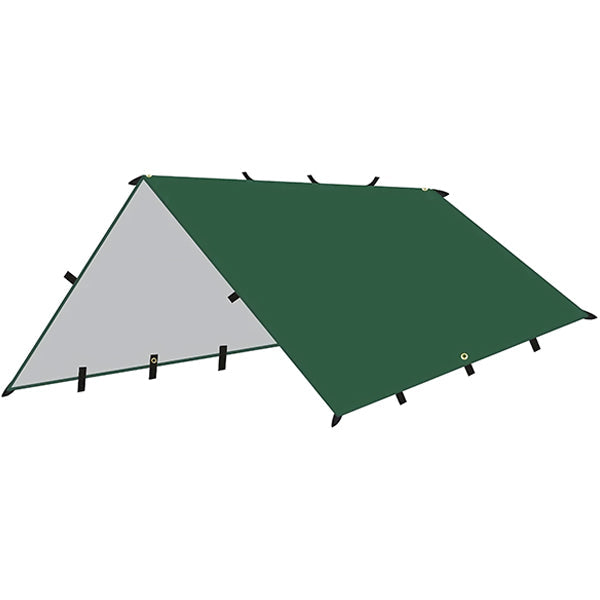
For maximum enclosure, pitch a low A-frame and fold one portion of the tarp under as a floor, then bring the opposite side down to meet it and stake it closed. With a square tarp you can also fold the ends inward to block wind-driven rain. It behaves much like a small tent without poles or mesh, so ventilation drops and condensation rises; leave one end partly open when you can. A purpose-built option such as our waterproof dark green tarp shelter simplifies this kind of setup.
8. Emergency bivy
When conditions turn bad or you need shelter in minutes, keep it low. Tie a short, low ridgeline or simply anchor one edge to a fallen log, lay half the tarp on the ground and fold the other half over you, staking or weighting the edges with rocks. Pair it with dedicated emergency shelters in your kit for situations where every minute counts.
Pitching Tips That Make the Difference
- Tension the ridgeline first: a slack ridgeline means a sagging roof that collects water.
- Pitch the windward side first: stake the side facing the wind before the fabric starts acting like a sail.
- Add drip lines: tie a short piece of cord to the ridgeline just inside each tree so rain running along the line drips off before it reaches your shelter.
- Re-tension at night: fabric and cordage can stretch as temperatures drop or rain falls; adjustable knots make this a quick job.
Rounding out your setup with stakes, a knife and a reliable fire starter makes any of these pitches easier. You will find these essentials in our bushcraft gear range.
Frequently Asked Questions
What is the best tarp shelter setup for rain?
A low, steep A-frame or a plow point sheds rain best. Keep the slopes steep so water runs off quickly, point the closed or low end into the wind, and add drip lines to your ridgeline so water does not travel along the cord into the shelter.
What size tarp do I need for one person?
Choose a tarp that is clearly longer than your body when lying down and wide enough to pitch with steep sides. A square tarp gives one person the most options, since it supports diagonal and folded pitches as well as the standard A-frame.
Can I set up a tarp shelter without trees?
Yes. Trekking poles, straight sticks or a paddle can replace trees as uprights. The diamond and plow point need only one raised point, and the emergency bivy needs none, which makes them good choices in open terrain.
Is a tarp warmer than a tent?
Generally, no. A tent traps more air and blocks drafts better. A tarp can still be comfortable in cold weather if you pitch it low, block the wind side and use a well-rated sleeping bag and insulated pad. A lean-to in front of a fire can also reflect heat toward you.
How do I stop my tarp from sagging overnight?
Tension the ridgeline with a trucker’s hitch, use adjustable taut-line hitches on every guyline, and check the lines before you sleep. Fabric that stretches when wet, such as some nylons, may need a quick re-tension after rain starts.